
SELLER GUIDE

Learn GalaxyGo Business
in a few minutes.

Seven short steps, from setting up your store to handing off your first order. They work the same in the Business app and in the portal on your computer.

1

Set up your store

Business app or seller.galaxygo.app

  1. Create your account with your email and a password.
  2. Answer one quick question, then add your store name, category and address.
  3. Upload your documents (business license or home food permit, and anything your products need).
  4. Tap Submit Application for Review. We'll email you as soon as your store is approved.

Tip: you can skip documents and come back later, but your store can't go live until they're approved.
2

Get paid

Settings → Payouts & Banking

  1. Tap Set up payouts.
  2. Connect your U.S. bank account with Stripe (it takes a few minutes).
  3. When you see Payouts active, you're ready. Stripe also handles your 1099 tax form.

Tip: your location code (like GG-0025) appears on every deposit, so you can match payouts to each store.

3

Add your products

Catalog

  1. Tap + to add a product: name, price, photo and description.
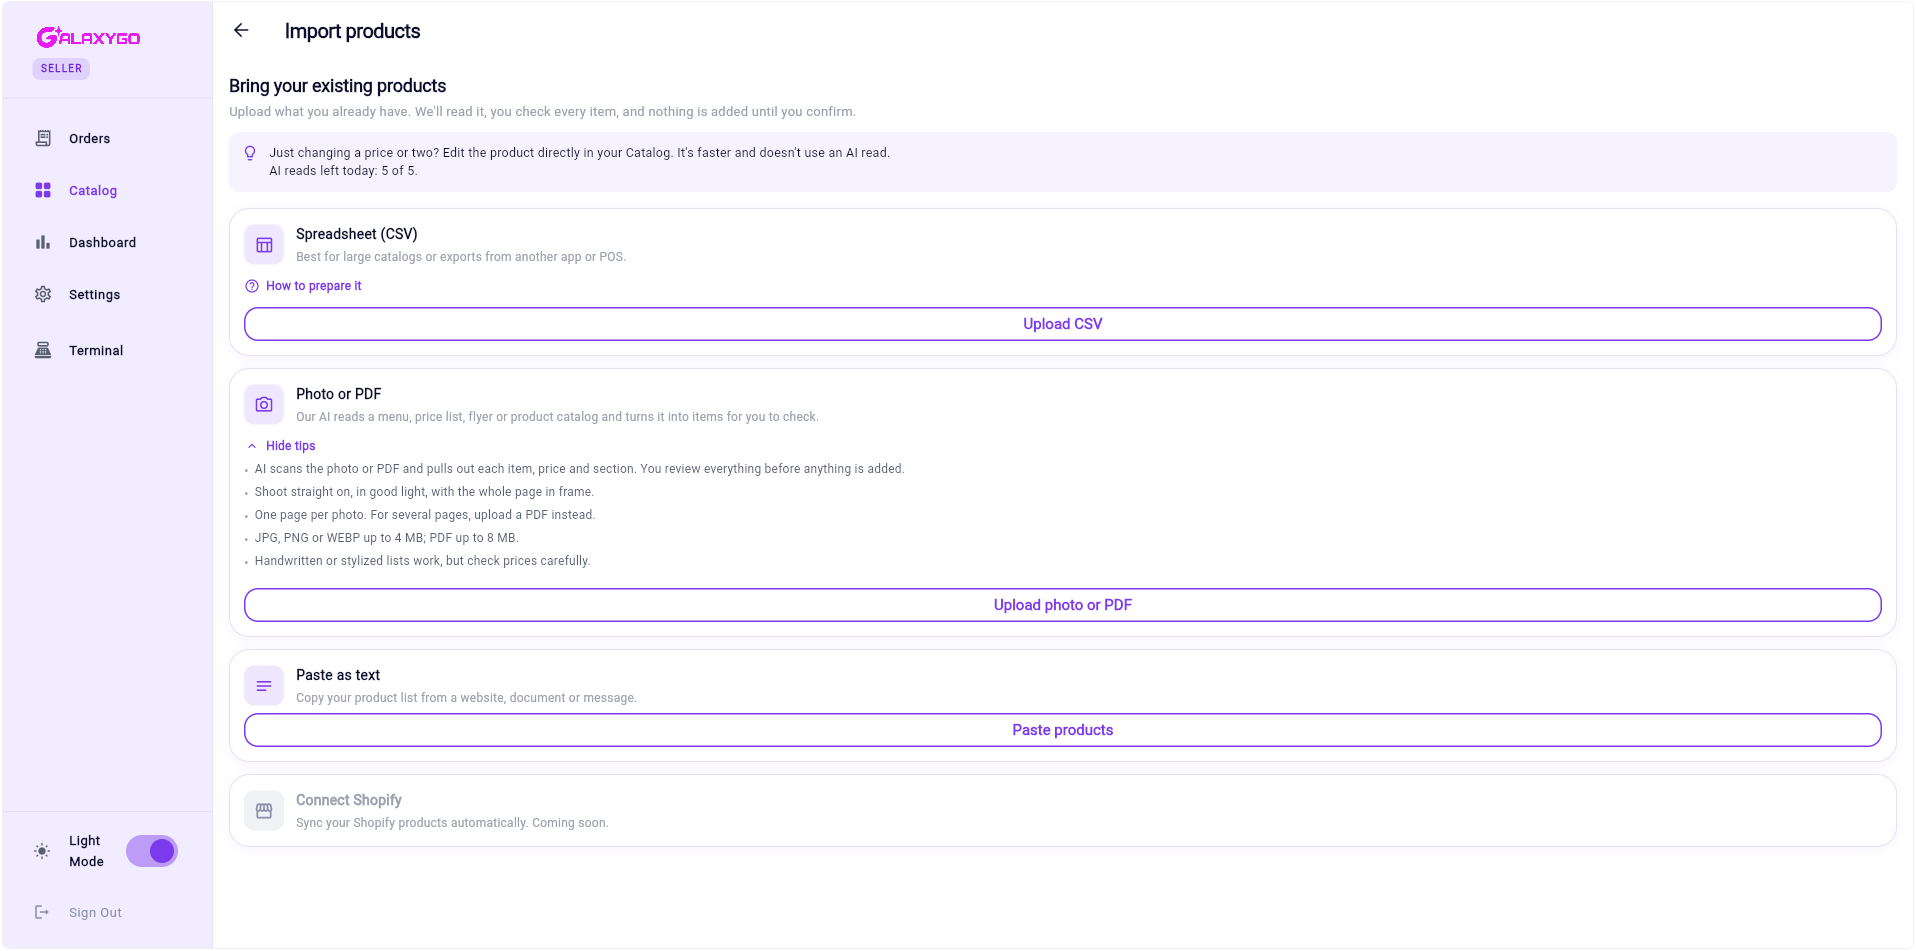
  2. Have a lot? Tap Import and upload a spreadsheet (CSV), a photo or PDF of your price list, or paste a list. You review every item before anything is added.
  3. Use the switch on each product to turn it on or off — great for items that sell out.
Import products screen with spreadsheet, photo or PDF, and paste options
4

Open for orders

Settings → Availability & Hours · Dashboard

  1. Set your hours in Availability & Hours.
  2. On the Dashboard, choose Open to take orders.
  3. Too busy? Choose Busy to pause new orders for a while, or Closed to stop orders.
5

Handle an order

Orders

  1. New orders appear in New. Tap Accept (or Reject if you can't make it).
  2. Prepare it in Active, then tap Mark Ready.
  3. Delivery: a GalaxyGo Pilot picks it up from Ready.
  4. Pickup: tap Hand over to customer and enter the customer's 4-digit pickup code from their GalaxyGo app.
  5. Finished orders move to Out.

Tip: have orders ready within your prep time. If a Pilot waits more than 5 minutes past it, a wait charge applies.

6

Bring in your team

Settings → Locations & Staff · Terminal & Clerks

  1. Managers: in Locations & Staff, tap Invite and enter their email. They get their own login.
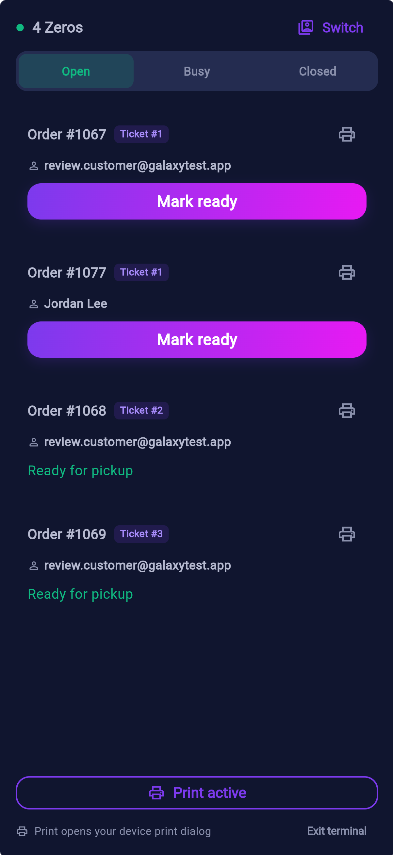
  2. Counter terminal: in Terminal & Clerks, add a PIN for each staff member, then tap Start terminal.
  3. Staff tap Switch to change shifts. Leaving terminal mode needs the owner or manager password.
  4. More stores? Tap Add another location — each one has its own products, hours and payouts.
Terminal mode with open orders, Mark ready buttons and Print active
7

Print & get help

Terminal · Settings → Help & Support

  1. In terminal mode, tap the print icon on an order, or Print active to print every open ticket. Your device's print dialog opens — any printer works.
  2. Questions? Go to Settings → Help & Support, or email [email protected].
  3. You can reopen this guide anytime from Settings → Seller Guide.

Quick tips

  • On a computer, bookmark seller.galaxygo.app and keep the tab open during your hours.
  • Turn on notifications for the Business app so you never miss a new order.
  • Never share your password — invite managers or use terminal PINs instead.
  • Add clear photos: products with photos get noticed more.

Ready to start selling?

Get the GalaxyGo Business app, or open the portal on your computer.